|
|
|
BT3100 Zero Clearance Inserts
 |
 |
 |
 |
 |
 |
 |
| Like every other saw I've ever seen, the BT3100 benefits from having a zero clearance insert (ZCI) or zero clearance throat plate installed. While such an insert may help reduce chipout on the bottom of a cut for a time, it's main purpose is to keep small cut-offs from falling into a wide blade gap and either clogging the dust port or worse yet binding against the blade. These inserts also lessen the likelihood that the operator will be tempted to remove any small off-cuts near the blade when the saw is powered. Safety is always enhanced any time a device or process is introduced that lessens the likelihood that an operators hand will be close to a moving blade. | 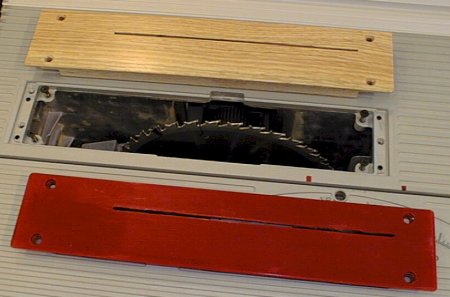 |
| The BT3100 has a uniquely shaped throat and it is difficult to find an aftermarket supplier for these The OEM throat plate has a gap of about 0.5 inches. The BT3100 accessory package includes two plastic throat plates that can be used. These are okay to get you up and running quickly but they are not as rigid as one would desire. | |
 |
Even though the BT3100 requires a
unique plate, it is not too difficult to make one. A wide range of materials could
be used from metal, wood, and even plastic. If plastic is use be sure to avoid those
that are prone to shattering (like plexiglass). Phenolic would be a very good choice
since it is strong and easily machined. In this example, I am using 0.75" thick quarter sawn Oak. This example is installed the same way the OEM ZCI is installed, using four flathead screws. In order to level the plate, I drilled four holes and installed 10-32 set screws in them. These are adjusted to level the plate with the rest of the table. This isn't the only way to level the plate, one could also use the same three flathead screws used to install the original throat plate, this would actually be less work that what I did.. |
| Because of the thickness of the
shop made ZCI, it needs to have some relief cuts made in the bottom to allow the blade to
be raised to its full height. This is actually the hardest part of making the ZCI
and that is only if you don't have an existing pattern to go off of. Once you have
made one of these, it would;don't take much effort to make another, all the hard
"figuring out" work is done by then. Note that in these pictures the riving knife and "guard" is not fitted. The removal of these devices will place the operator at greater risk. The ZCI shown could be modified to include the OEM riving knife or a shop-made splitter if desired. |
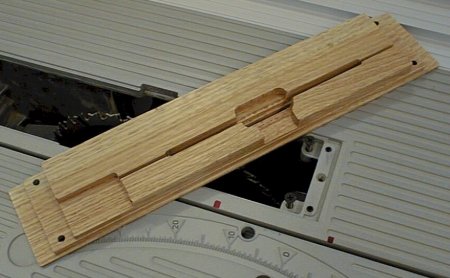 |
Note that this particular ZCI is designed to be used with the blade at 90 degrees (not tilted) and would not be used with a dado or moulding cutter head. |
|
 |
 |
 |
 |
 |
 |
 |