|
|
|
 |
 |
 |
 |
 |
 |
 |
Getting Organized
|
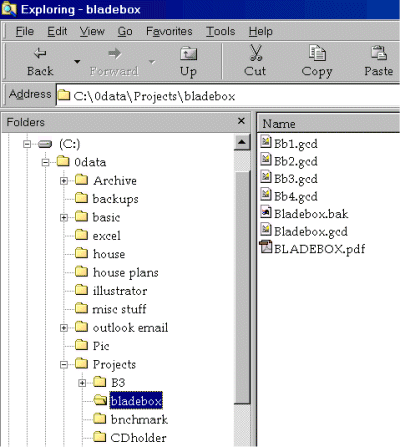
| A typical project subdirectory might contain one or more CAD
files, a spreadsheet bill of materials, a word processor document, a pdf file, or anything
else that is uniquely related to that particular project. Somewhere further up the
directory tree there might also be a symbol library of CAD parts and other files that are
CAD related but generic in nature. To the right is an example of a directory structure organized to store data. The main directory is 0data. In addition to several other sub-directories beneath it, there is a "Projects" directory where all the woodworking related project would / could be stored. The current directory (bladebox) holds all the files related to that project. |
 |
| Learning the System CAD software has a deservedly bad reputation for requiring a lot of user effort before one becomes productive with the tool. The reason for this is due to the complexity and power required for the tool to do it's job; unfortunately there is no easy way around this. Many CAD systems have tutorials in the manual or on-line that can help a user become familiar with the overall concepts and tools used by a particular system. Even though most tutorials are pretty basic, it is worth a new users time to go through them. Another invaluable learning tool is to have a CAD literate friend serve as a tutor on the operation of a system. Most literate users will be able to help a new user out quite a bit even if the software in use isn't the one they are familiar with. Many of the concepts of how tools operate will be similar if not the same and even when things aren't similar, a literate user will at least know what to look for. The most important benefit of tutoring is that the tutor can show a new user in very graphical terms generally how to operate the system. An hour of hands-on graphical illustration is worth at least 10 hours of frustration that will result from "going it alone". After the tutorial, one of the key elements of teaching yourself CAD is to have a real project to learn on. One could draw circles, rectangles, and lines forever but until there is a real world application to complete, the education will be woefully incomplete. Learning the system is so fundamentally important that I'll summarize it:
Layers |
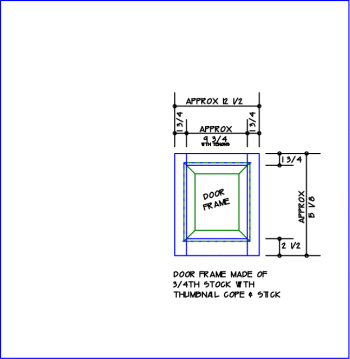
| Layering is one of the most beneficial
and powerful aspects of CAD over traditional manual drafting. Layering allows one to do
more than DRAW, it allows one to DESIGN. In the image at right, a very simple three layer drawing of a frame and panel door is shown. The blue layer holds the door frame, the green layer is the door panel, and the black layer holds the dimensions. By looking at the drawing this (normal) way it isn't particularly apparent there are any layers at all or if there are, what information they may contain. The Layer Manager should help in this regard if meaningful layer names are used though. |
 |
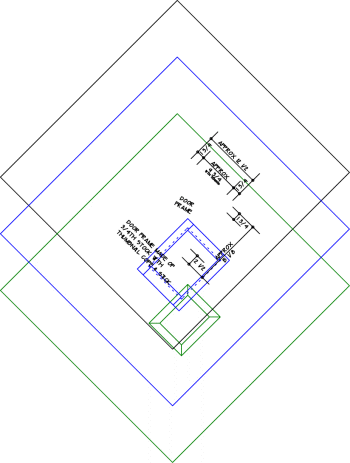 |
In this image, the same drawing information has been rotated so the layering concept is more visible. Note that this is not possible to actually see the information as presented here in this format on 2d CAD software, this is for illustration purposes only. Now it can be seen that the dimension layer (black) is actually on a different plane than the other two layers. This drawing sandwich allows the information to be organized in a more useful way which in turn allows the user to only view the information desired. It also makes it easier to copy and edit selected drawing elements. In truth, a user would not have to use different layers in a drawing but this would reduce the power of the drawing system greatly. This will be made more apparent in a subsequent article. |
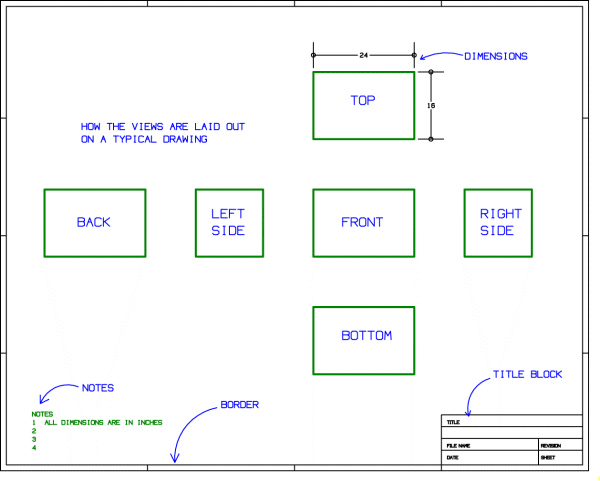
Layout Most likely the drawings that will be created will be printed on 8 � x 11 sheets of paper. Other sizes could be used but that is the maximum size most users will have access to so this must be taken into consideration when drawings are laid out as well. |
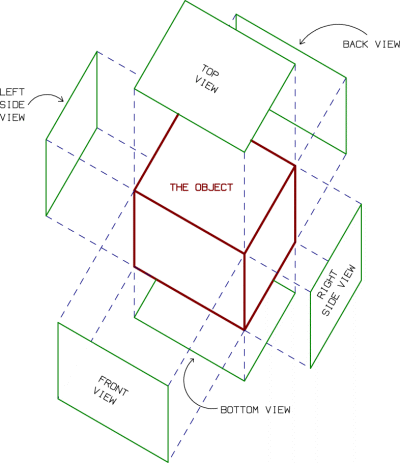 Where Views Come From |
Proper View Orientation |
| Since 8 � x 11 sheets of paper are the likely printed size, woodworking projects of any complexity will need to be multi-page documents; when the project is laid out in software this must also be taken into account. Some software allows the printed output to be "tiled". That is, the drawing will be printed out 1:1 (full size) in 8 � x 11 chunks that must be taped together to form a single big piece of paper. For drawings of patterns and such, this can be a useful output. Otherwise, it's a lot of work one would rather not have to go through. |
Back to the Woodworking With CAD Index
 |
 |
 |
 |
 |
 |
 |