|
|
|
Setting Jointer Knives
 |
 |
 |
 |
 |
 |
 |
This is a generic article that briefly explains a process for setting the knives in a jointer. The method presented below really boils down to thorough cleaning and setting using two dial indicators. The process doesn't take too long but it shouldn't be rushed, after using other techniques, I've found this method leads to less frustration and higher accuracy. |
|
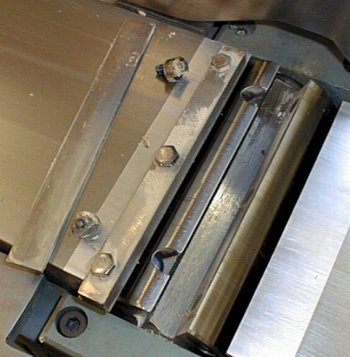
This is a picture of one of the knives that has just been
removed from the cutter head. The knife is held in place with a wedge, it rests on
the ledge of the two small steel dowels. The procedure used to remove the knives varies according to the particular machine, some jointers use a spring adjustment mechanism. The wedges are designed such that the centrifugal forces on a spinning cutterhead will wedge the knife tight even if the wedge were not as tight as it should be, this is a safety related aspect of the design. In the case of this machine, the three wedge bolts are loosened and all the parts can be pulled out of the head. It is VERY important to thoroughly clean all the parts that make up the head assembly, if the parts aren't thoroughly clean, you won't be able to set them as precisely. I clean everything including the area in the head where the knives go. |
| This picture illustrates something commonly known as "the screw trick". If you take a close look at the ends of most screws and bolts you'll note that the ends are rarely perfectly formed, most in fact have a cup or scythe feature on the end. When the ends of these screws contact other parts they can sometimes influence the parts in undesirable ways, this is especially true when those parts or assemblies are being measured or adjusted in increments of a thousandth of an inch. | 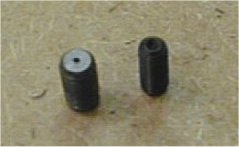 |
What you see here is one of the setscrews from the dowel and another unmodified screw to the right of it. The end of the screw has been sanded flat with a belt sander and then buffed with a flapwheel, the center of its former "cup" remains. The "screw trick" works in more situations than seen here. Note that something similar was done to the wedge bolt head (which is slightly domed). |
|
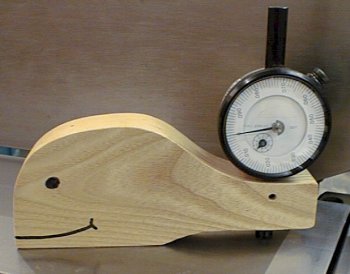
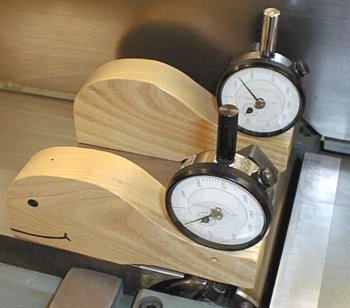
Note: I use a dial indicator jig to set jointer knives. This is a shop-made device but there are commercial ones available. I'm using a common dial indicator with a flat tip installed. I'm calibrating the zero point (which is the plane of the outfeed table). Note that imbedded in the bottom of Moby here are some magnets to keep him in place. Once all the parts have been cleaned, inspected, and the knives have been resharpened, they can be installed. I install one knife at a time using the following process: |
 |
 |
1. Put a
very light coat of oil on all the parts including the area of the head. This is to
ensure the mating pieces SLIDE against one another during the adjustment process. I
also put a dab of white lithium grease on any bearing parts such as the heads of the wedge
bolts, the contact points on the dowels, abd the ends of thier setscrews. You won't
have to worry about contamination if you use a light coat, any excess is going to be slung
out immediately; you may get some on the jointer table that can be easily cleaned off. 2. I get the height of the knife "close" on both ends but below the "target"; "close" is 0.005" to 0.010". The wedges are somewhat tight but not too tight such that they will not allow for any movement, they are tight enough to guarantee that ONLY the knife is moving though. |
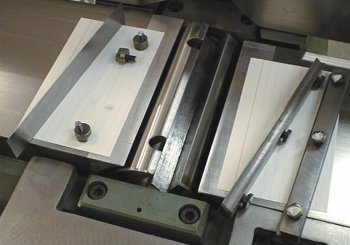
3. Once the knives are "close", I alternately adjust each raising screw to raise the knife a thou or two until I reach the "target" on each indicator. 4. Once the target is reached, I alternately tighten the wedge screws. The wedges are already tight at this point, this further tightening is about a half-turn of the screw. If I have done a careful job throughout the process, the knives will not change their position from the target (this is a common problem when setting knives). Note that above I a show using TWO dial indicators, this is a little crowded on a 6" machine; two are not required. The indicators have flat tips installed to more easily determine "top-dead-center". Although you can set jointer knives with only one indicator, two is nice because you can immediately see the movement you are inducing at the opposite end (and there will be some) when you are adjusting the knife. |
 |
Important Considerations:
|
 |
 |
 |
 |
 |
 |
 |