|
|
|
Rip And Rotate
 |
 |
 |
 |
 |
 |
 |
Some time ago I developed a process for obtaining rift and quarter-sawn stock from regular construction grade pine lumber; I called this process Rip And Rotate. I have no doubt that I did not actually invent this process but I’ve never seen it described anywhere. I want to make clear right up front that this is a LOT of work and this is NOT a process that I generally recommend. I do however receive a fair amount of questions from folks who want to know where I get clear pine or want to know what the process is. There are three reasons that I go to all the trouble to go through this process:
To make this process work you’ll need the following:
I use the lumber from this process primarily for shop cabinets and some simple furniture items. One could potentially use it in a complicated furniture project but the high moisture content would make that a little risky. Here is the sequence for the R&R process: Step 1: Step 2: Step 3. Step 4.
Step 6.
|
|
 |
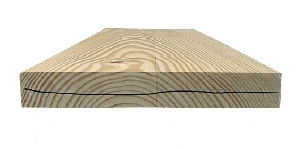 |
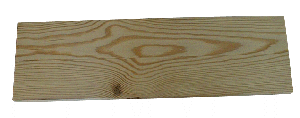
| This is a top view of a selected board at the Step 2 stage of the process. | This is the same board shown on-end. |
Step 8. |
|
 |
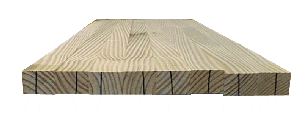 |
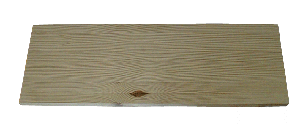
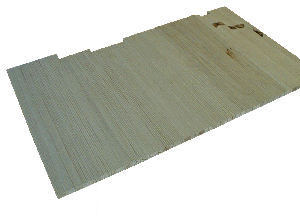
| This is the same board as above after Step 8. The strips are pushed together to show the grain pattern obtained after this step. | This is the same board shown on end. |
| Step 9. Sort all your (same thickness) rips for grain matching, this is the fun part of the process. Basically what you'll get is a whole bunch if sticks to edge-glue together. I sort all the lower grade sticks to one end, these usually become the "extra" stock but as you can see from this example, there would be a fair amount of clear even in these "bad" sticks. This sorting will allow you to control the grain patterns and cull out any knots or otherwise low grade or problem sticks. |
 |
Step
10. |
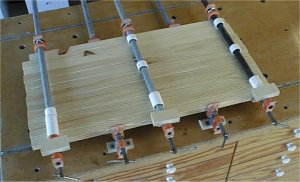 |
Step 11. Step 12. Again, as you can see this is a lot of work, I don't recommend this process unless you really want the look it gives you. If you have the tools and your shop is set up ready-to-go then it isn't really that big of a deal. The process takes me anywhere from 2 - 4 hours per 30 square feet. It also generates a mountain of chips.
|
|
 |
 |
 |
 |
 |
 |
 |